Screens for Ren'Py Dummies (me) | Part 3: Position
Previously on...
Wow, it's been 22 days since the last post! Whoops. In part 2, we learned the very basics of making a screen, including adding some text and images. We also learned what a block is.
Today we will be learning how to place things in the correct location in a screen.
The current outline for this series is as follows. This may change as the series goes on:
- What is a Screen?
- Making a Screen
- Position (you are here)
- Anchor
- Position Style Properties
- Containers
- Screen elements. Text. Images, and Everything Else.
- Actions. Buttons. Input.
- Styles.
- Logic. Variables. Python.
- Ren'Py's default UI and why it sucks.
Positioning
The pixel grid
When you create your Renpy game for the first time, you're asked what size it should be. The numbers you choose represent how many pixels (px) wide and tall your game window will be.
To be able to place something anywhere on the screen, we need to know how the pixels are arranged so we can target specific points on the screen.
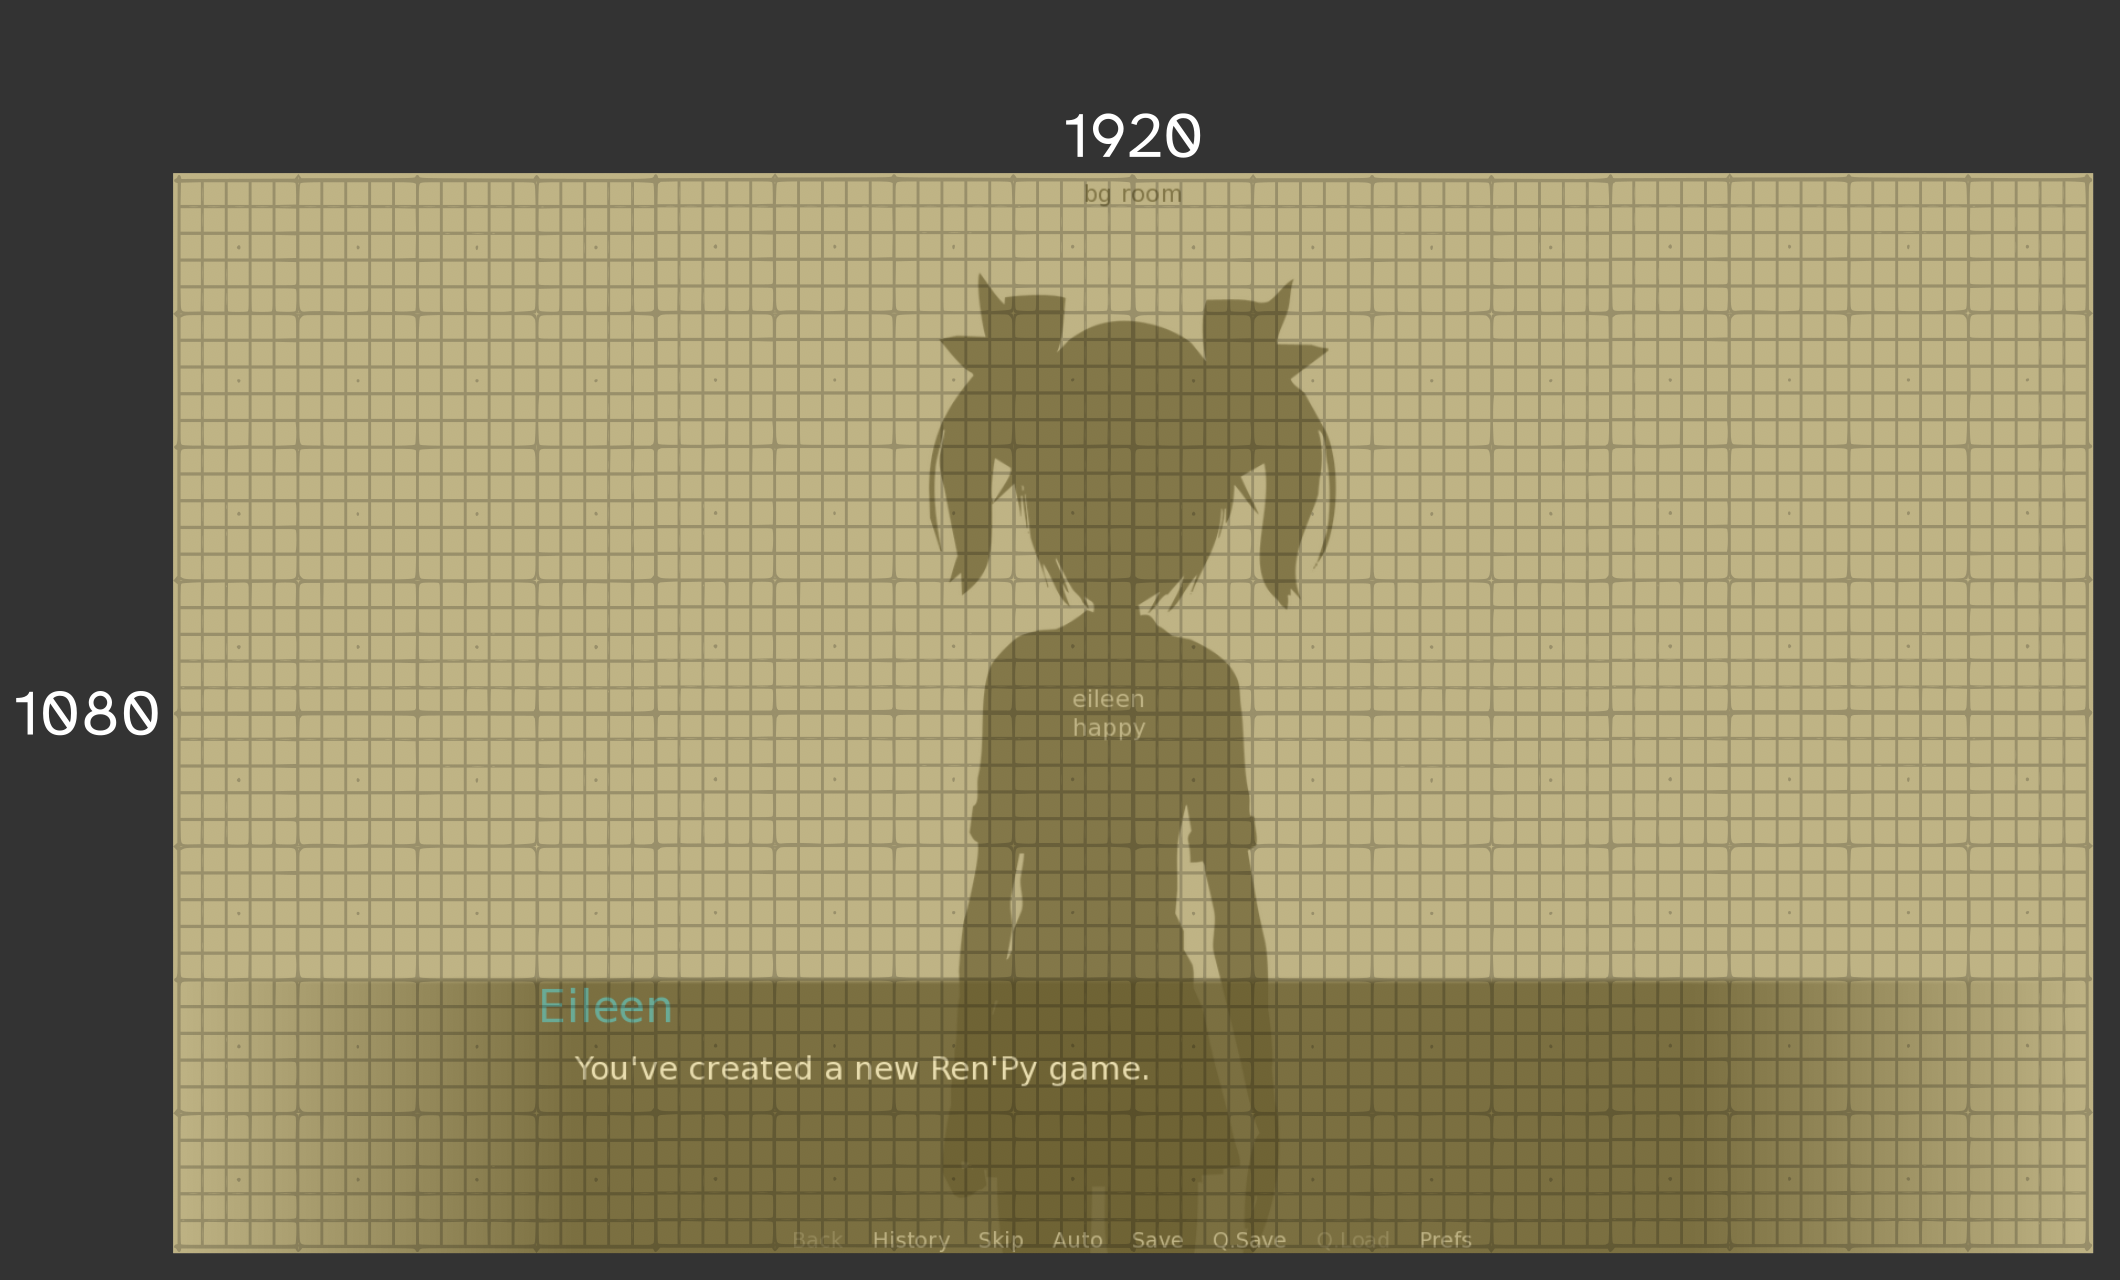
A 1080p game is 1920px wide and 1080px tall (16:9). The grid is not to scale.
xpos
First, let's focus on the horizontal x-axis (`xpos` is short for x-position). Each column of pixels is labeled in order starting from the left(←), at the 0th pixel, all the way to the far right(→) pixel which, for a 1080p game, is the 1920th pixel.

The x-axis of a Renpy game, originating from the left side and starting at 0.
You might have noticed the orange decimal number above the px whole number. This is because you can choose to use the literal pixel value or the relative decimal value of the entire game window i.e. 0.0 means 0% of the game width, and 1.0 means 100% of the game width.
For example you can choose to either use 960 (which is half of 1920) or 0.5 (which translates to the same thing).
Let's place some images at different horizontal locations in a screen (don't forget to show your screen to see it):
screen horizontal_test():
    add "cuteshadow" xpos 240
    add "cuteshadow" xpos 0.5
    add "cuteshadow" xpos 1920  # this will go off-screen
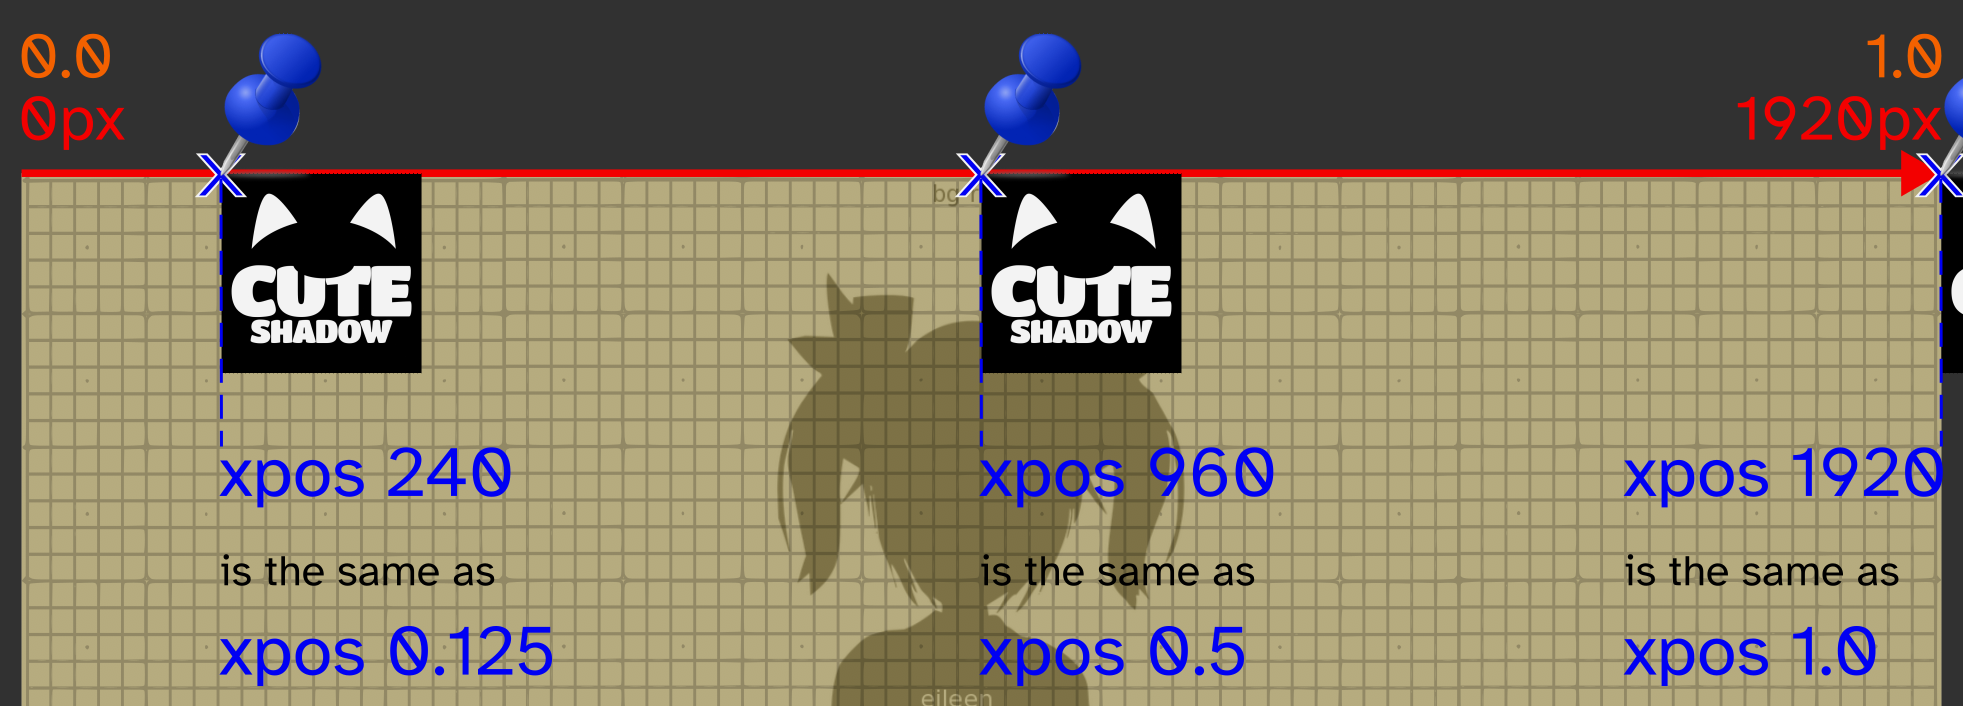
Choosing an xpos on the x-axis to place an image.
ypos
Because the screen is 2D, there is also a vertical y-axis (`ypos` is short for y-position). You're about to get some major déjà vu because everything here is exactly the same as before, just vertical. This is good time to revise if you've understood the concepts of position.
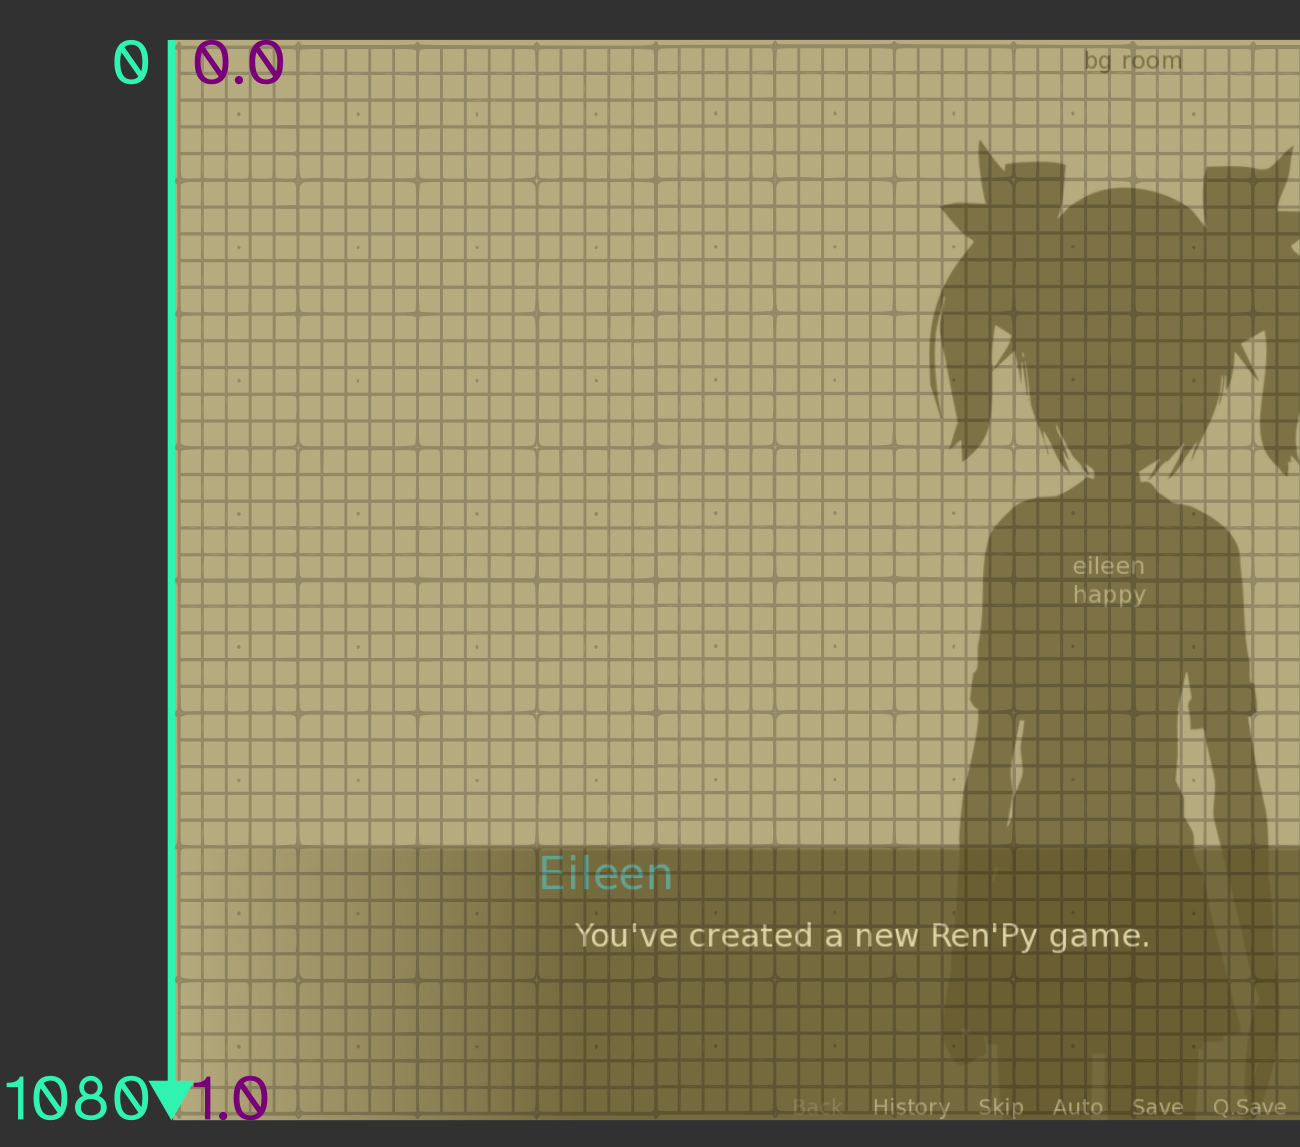
The y-axis of a Renpy game, originating from the top side and starting at 0.
Let's place some images at different vertical locations in a screen:
screen vertical_test():
    add "cuteshadow" ypos 216
    add "cuteshadow" ypos 0.5
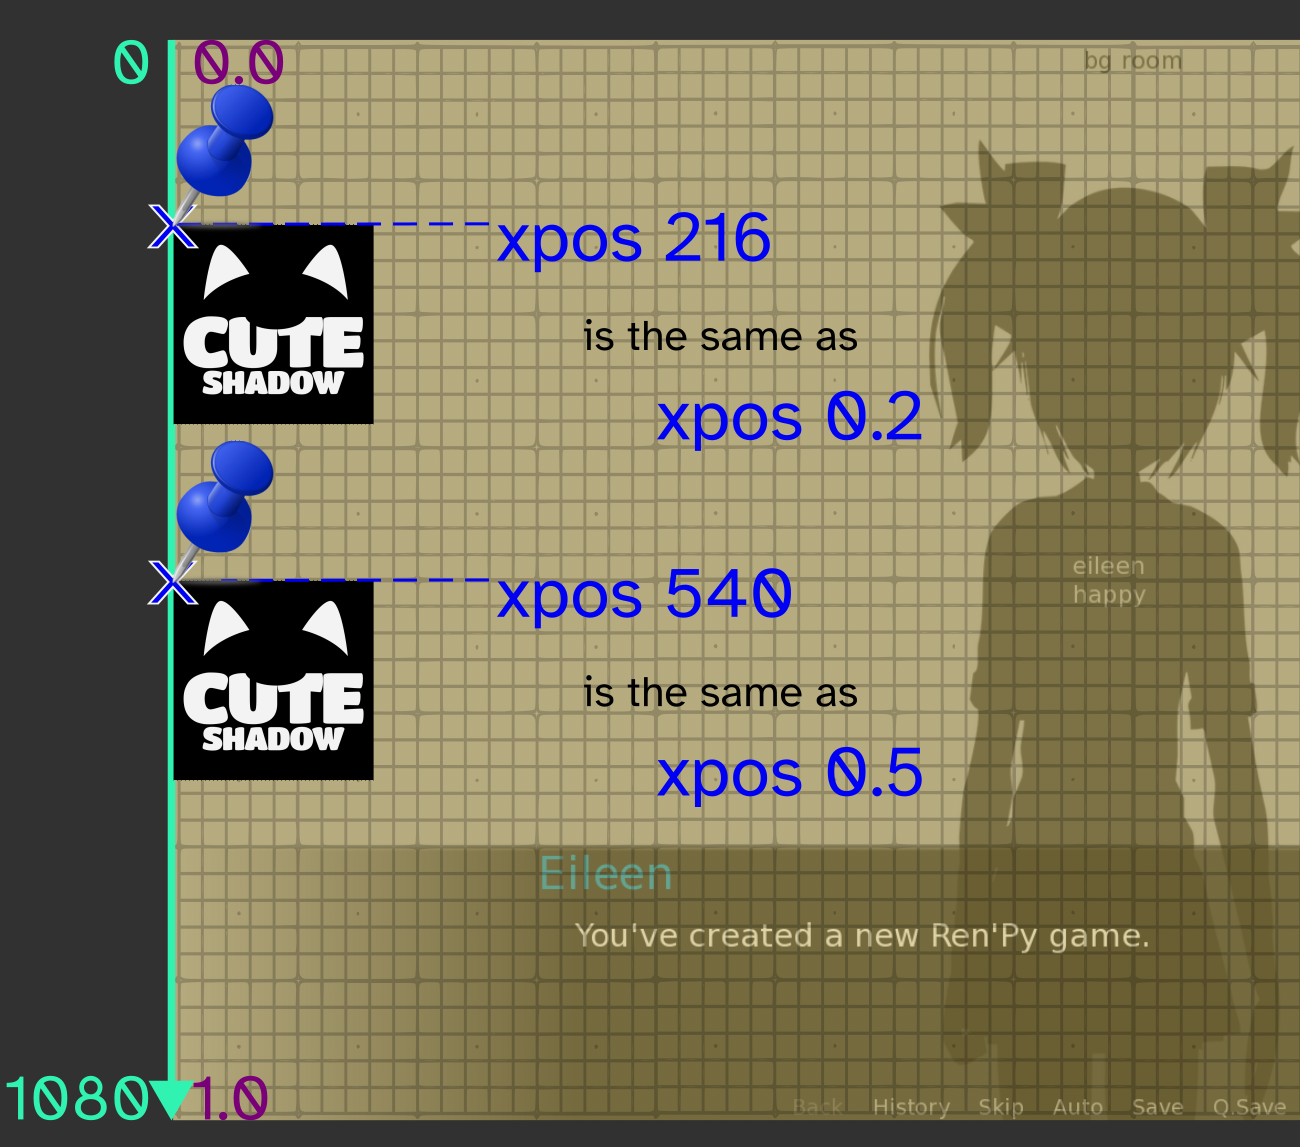
Choosing a ypos on the y-axis to place an image.
There is a TYPO on the image; it should say ypos not x.
pos
Great, you now know how to place something vertically or horizontally using the x and y-axis. But how do you do both at the same time so our image isn't stuck hugging the axes?
All you have to do is set both of them at the same time. Well that was straightforward but there's multiple ways of doing this, depending on which one you think looks nicer.
inline notation
This is what we've been doing so far to set the x and ypos. To have multiple properties you just write them after another in the line. This is neat as it only takes up one line but can get out of hand the more properties you have.
screen both_test():
    add "cuteshadow" xpos 0.5 ypos 0.5
block notation
When you have a lot of different properties, it can be easier to organise them if you write them like a list. To ensure the correct properties are applied to the things you want, start a new block and put all the properties in there.
screen both_test():
    add "cuteshadow":
        xpos 0.5
        ypos 0.5
Look carefully at the structure. The cuteshadow image is inside the both_test screen, and the x/ypos properties are inside the image.
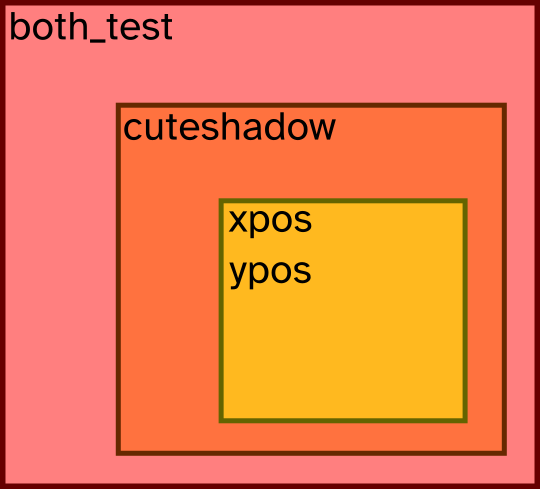
The screen hierarchy defined by the blocks. The image is inside screen. The position properties are inside the image.
mixed notation
You can actually mix inline and block notation in any combination you like. You can even use inline notation inside blocks. Please do this sparingly because it looks insane.
screen both_test():
    add "cuteshadow" xpos 0.5:
        ypos 0.5 xsize 200
        ysize 300
pos property
You might get fed up of typing xpos and ypos individually each time. If you're going to set both of them anyway you can use pos, which takes a pair of numbers like this:
screen both_test():
    add "cuteshadow" pos (0.5, 0.5)
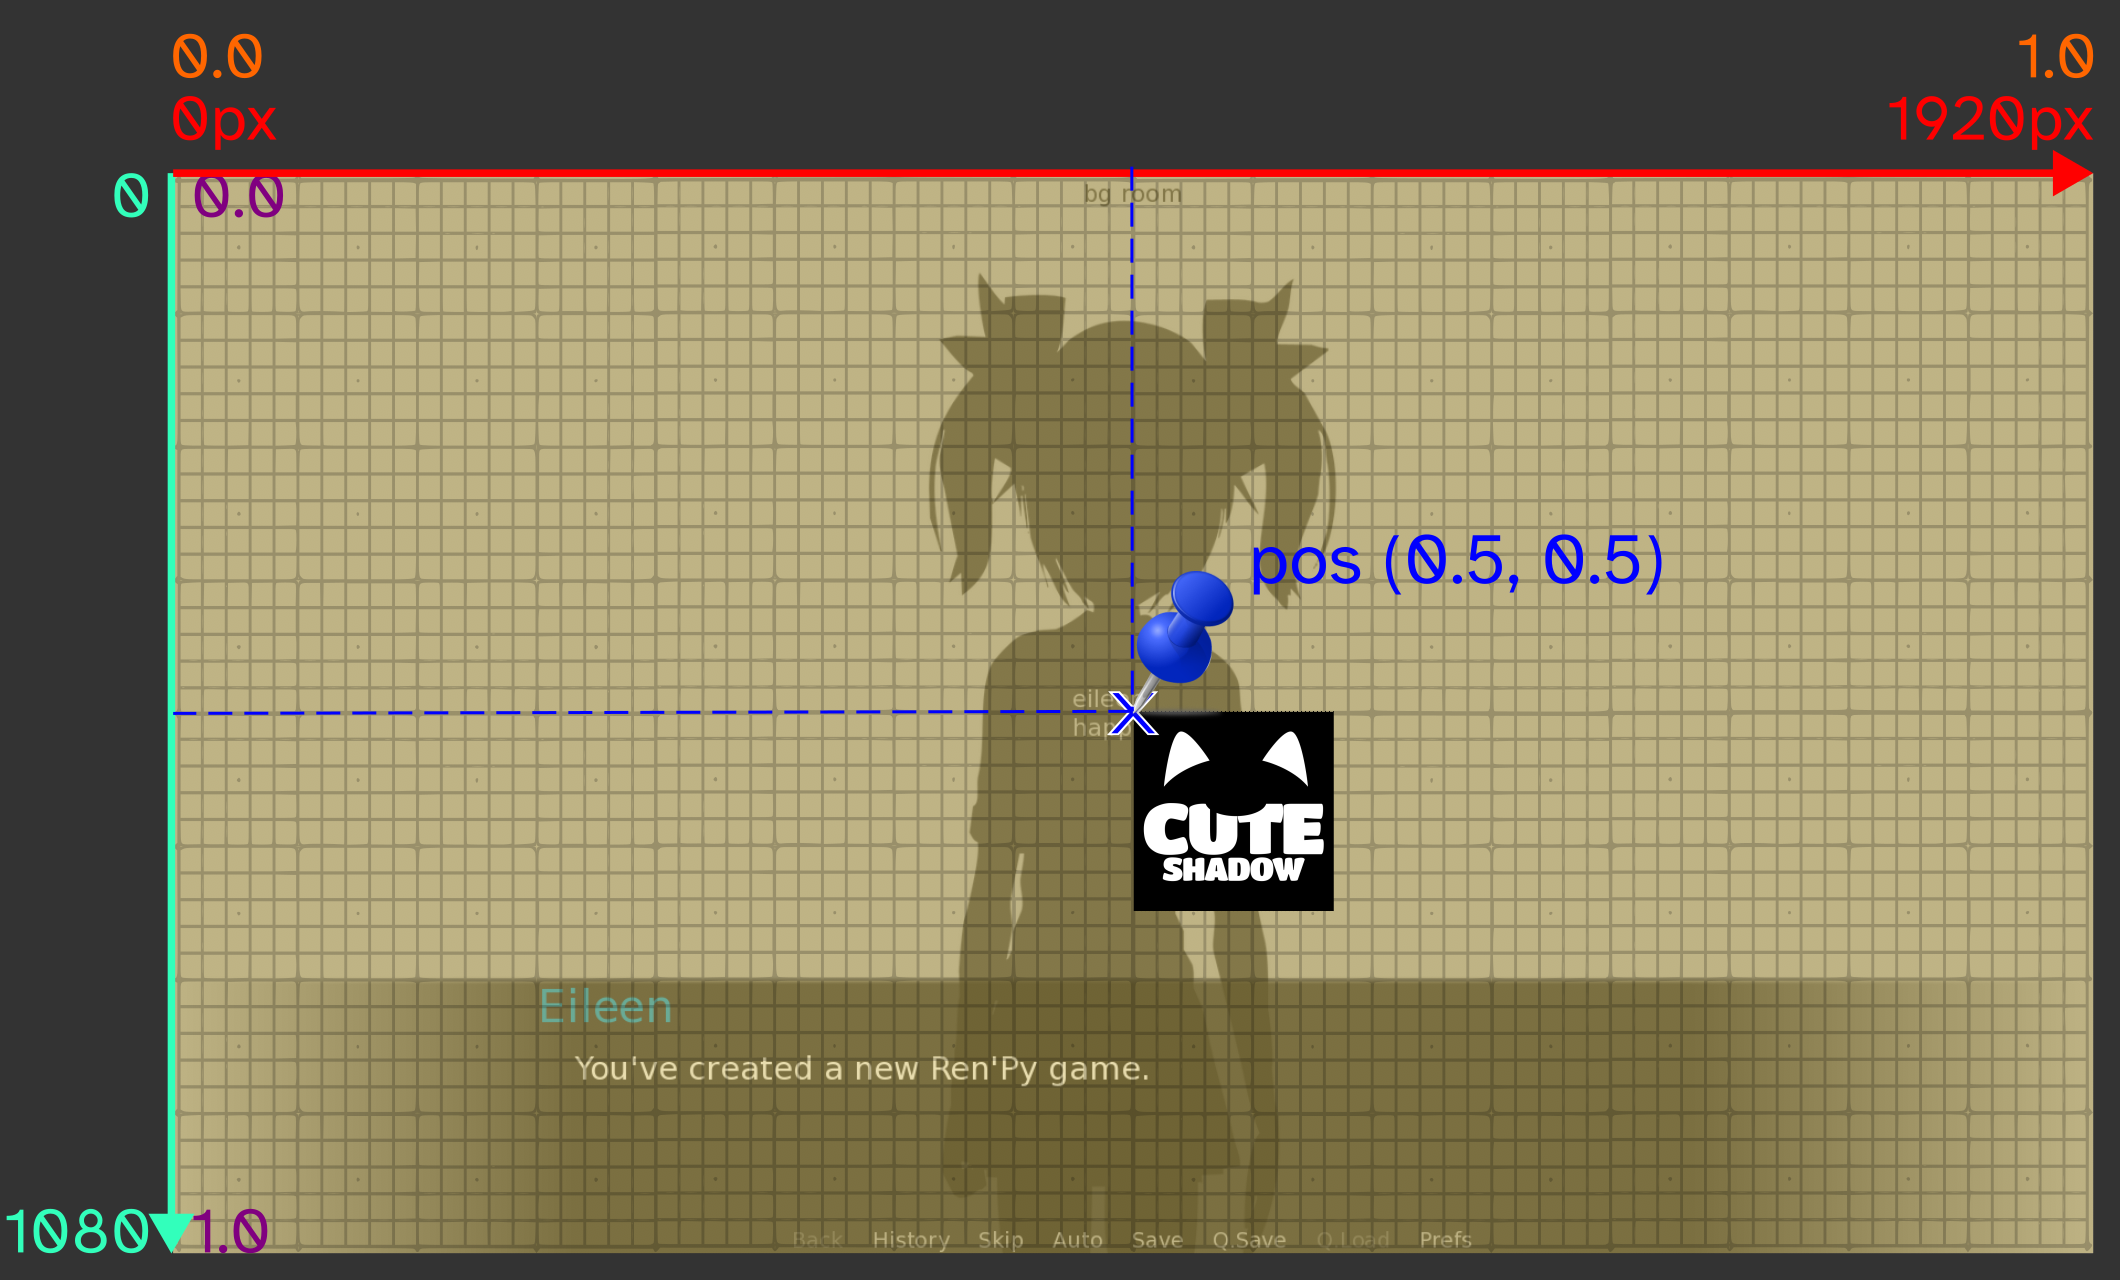
Using pos to place an image on the screen.
Conclusion
Things have started to get number heavy but hopefully you took it slow. It's not like you had to do any math calculations since it's just picking a point on a grid.
If you've been looking closely, you'll notice that whenever you place the image, it's always the top-left(↖) corner of the image that's being placed there. We'll be discussing that in the next part!
SUMMARY:
The screen is a coordinate grid with an x and y-axis, with the origin starting at the top-left(↖) corner of the screen.
To pick a point on the screen, you can use the literal pixel value, or a relative decimal percentage of the entire screen length.
There are many ways to set the x and ypos simultaneously, which allows you to place something anywhere on the screen.
Leave a comment
Log in with itch.io to leave a comment.